Introduction
Vue.js is a progressive JavaScript framework that makes it easy to build interactive web applications with minimal effort. Its gentle learning curve and modern features have made it a favorite for both beginners and experienced developers.
This guide provides a complete walkthrough on how to set up Vue.js in Visual Studio Code (VS Code) using Vite, a lightning-fast build tool. We’ll also cover crucial prerequisites, the best extensions to supercharge your development workflow, how to verify your setup, and how to troubleshoot common errors that may arise.
1. Prerequisites for Setting Up Vue.js
Before diving into development, install the following tools:
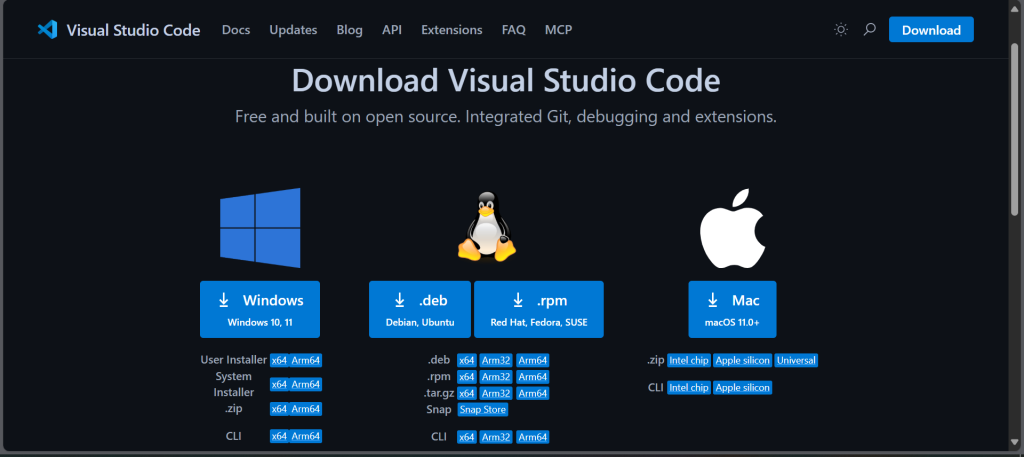
Visual Studio Code
VS Code is a lightweight, open-source code editor that supports extensions, terminal access, and intelligent code completion. Download VS Code
Node.js and npm
Node.js enables JavaScript to run outside the browser, while npm is used to install packages (like Vue and Vite).
Download Node.js (LTS version)
To confirm installation, run:
node -v
npm -v
if version numbers appear, you’re set.

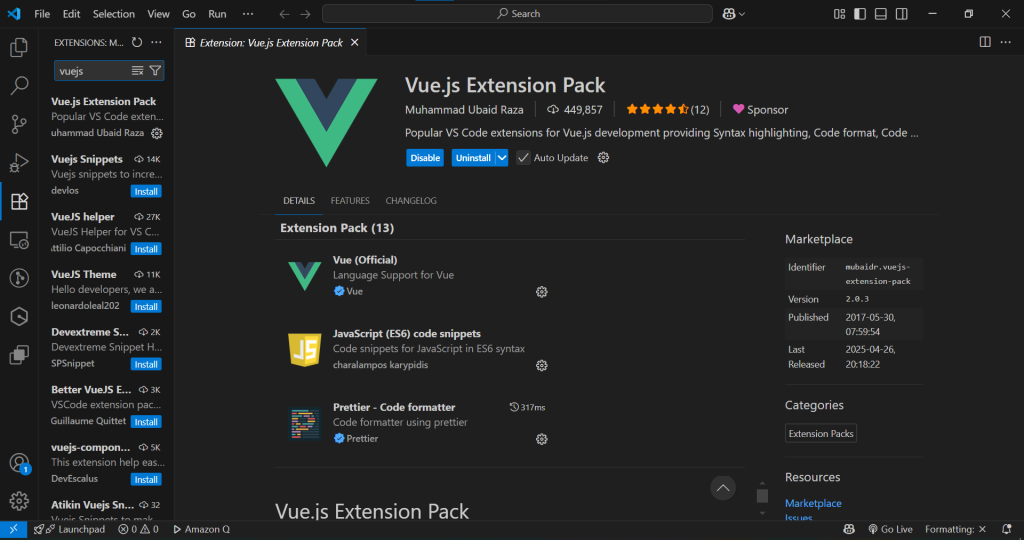
2. Must-Have VS Code Extensions for Vue.js
To get the best out of your Vue development experience, the right extensions in VS Code can boost productivity, prevent errors, and provide rich tooling support. Here’s a breakdown of the most helpful ones:
Volar (Recommended for Vue 3)
Volar is the official language support extension for Vue 3. It provides intelligent code completion, type checking, error highlighting, and support for TypeScript in Vue components.
Why use it?
Volar works perfectly with the <script setup> syntax in Vue 3 and offers native TypeScript support, which is now preferred over Vetur.
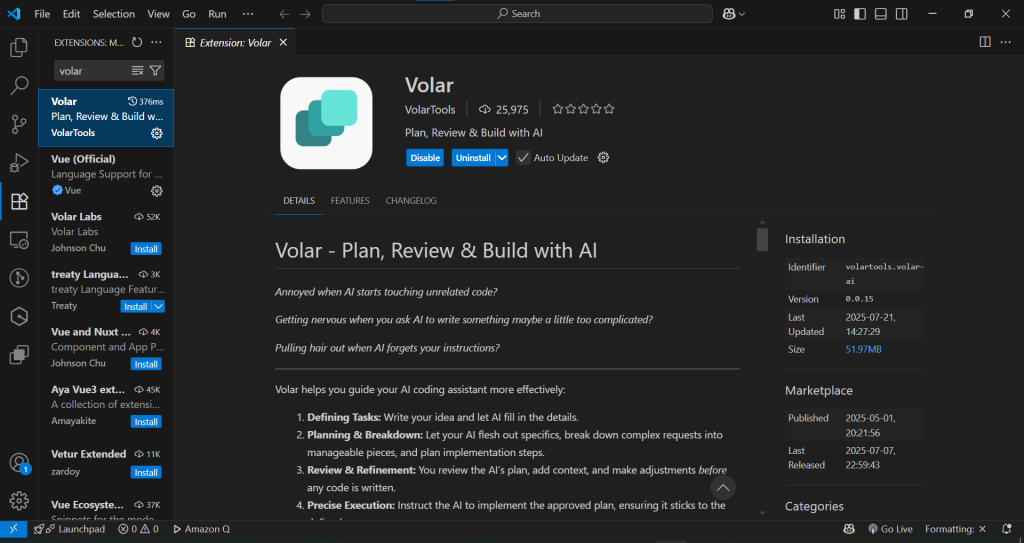
Important: Don’t use Volar and Vetur together. Disable Vetur if you install Volar.
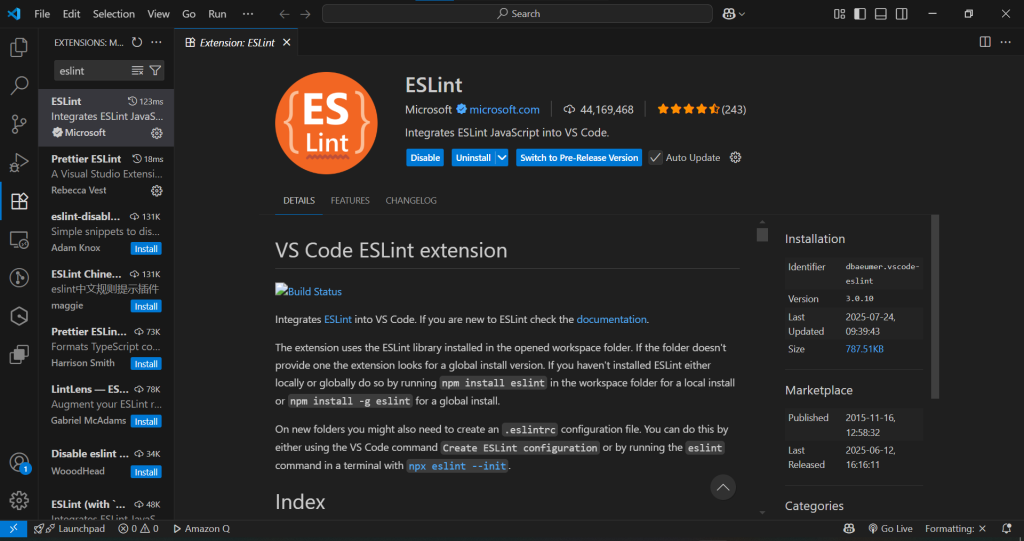
ESLint
ESLint is a powerful tool that helps catch and fix linting (code quality) issues in JavaScript and Vue files.
Why use it?
It enforces consistent coding standards and highlights errors before they break your code.
Configure ESLint using .eslintrc.json and enable auto-fix on save.
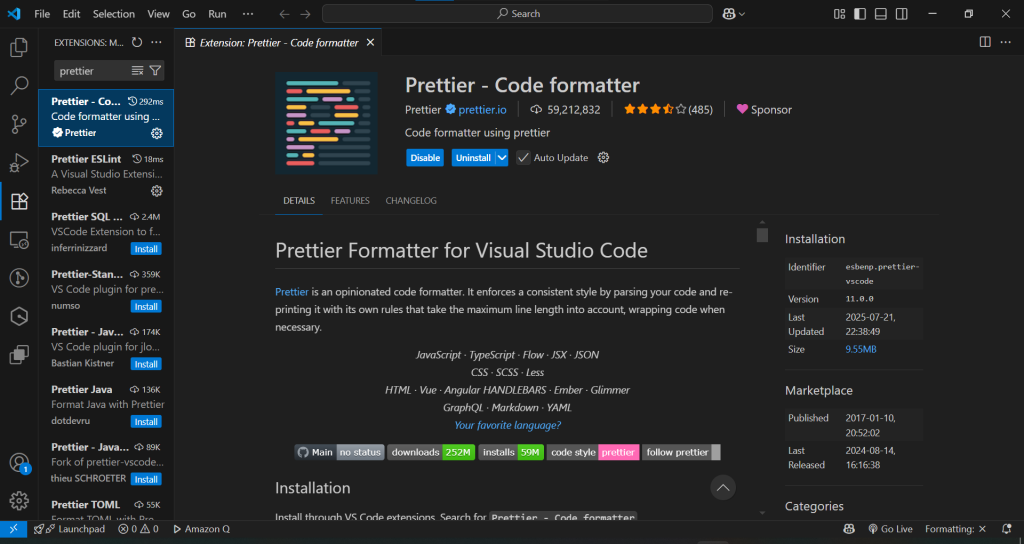
Prettier
Prettier formats your code automatically according to predefined style rules (indentation, spacing, semicolons, etc.).
Why use it?
Clean, consistently formatted code is easier to read and debug. It also avoids conflicts in team projects.
Set Prettier as the default formatter in your VS Code settings.
Vue Language Features (Extension Pack)
A curated collection of essential Vue tools, often includes Volar, snippets, formatting, and helper tools in one install.
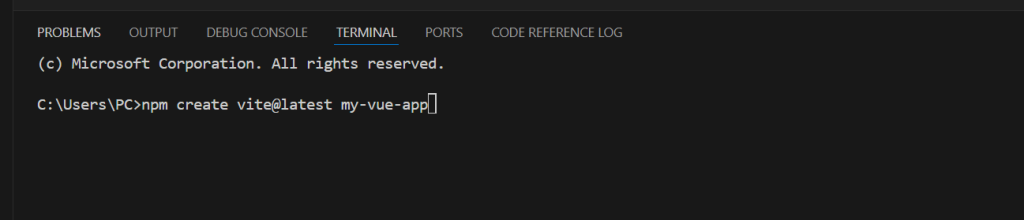
3. Setting Up Vue.js with Vite
Now that your editor is ready, create a new Vue.js project using Vite, which is significantly faster than Vue CLI.
Step-by-Step:
-npm create vite@latest my-vue-app
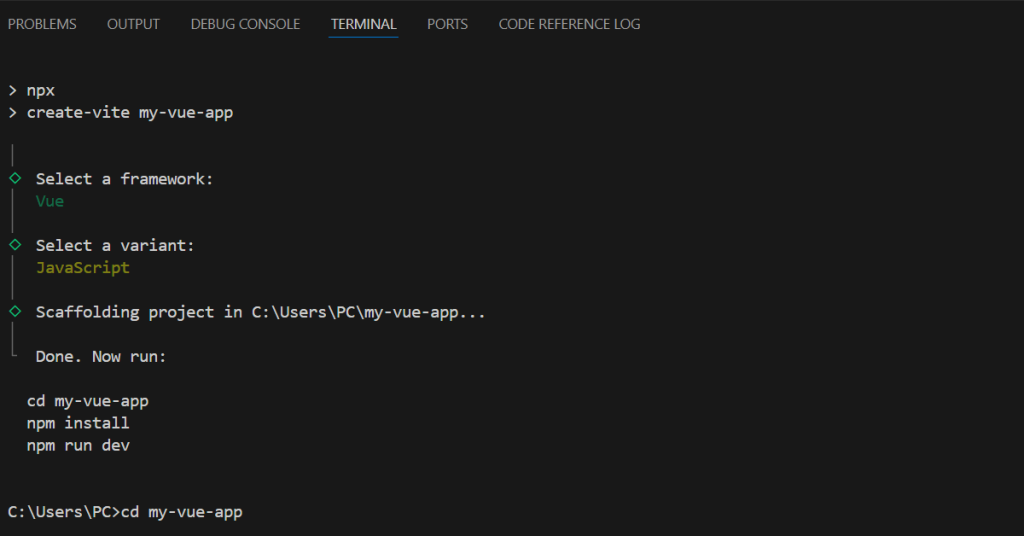
Then:
- Choose Vue as the framework.
- Choose JavaScript (or TypeScript if you prefer).
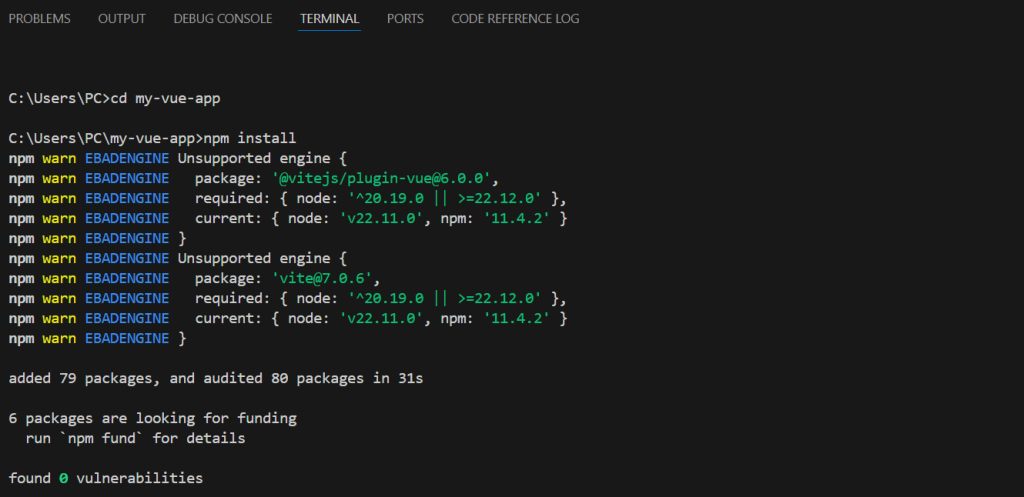
- Navigate into the project and install dependencies:
-cd my-vue-app
-npm install
- Launch the development server:
-npm run dev
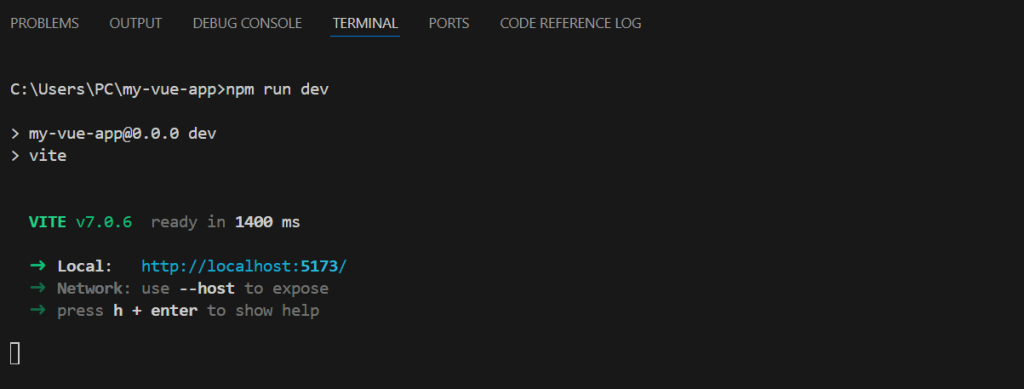
Access the project at http://localhost:5173.
4. Verifying Vue.js Installation
- To confirm your Vue setup is working:
- npm run dev should start the server without errors.
- Visit http://localhost:5173 — a default Vue welcome page should load.
- Open the project in VS Code. .vue files should display syntax highlighting and suggestions.
- Edit App.vue, save, and see changes reflected live in the browser.
5. Common Issues and How to Fix Them
| Problem | Cause | Solution |
|---|---|---|
node or npm not recognized | Node.js not installed correctly | Reinstall Node.js and restart terminal |
| Port 5173 already in use | Previous dev server still running | Close the process or use --port to change |
| Volar & Vetur conflict | Both extensions active | Disable Vetur if using Vue 3 |
| ESLint/Prettier errors | Conflicting configs | Sync rules and formatter settings |
| npm install fails | Cache or network issue | Run npm cache clean --force and try again |
Pro Tip: Read error logs carefully — they usually tell you exactly what’s wrong.
6. Conclusion
Getting started with Vue.js doesn’t just mean writing components — it starts with setting up your tools properly. With Visual Studio Code, the right extensions, and the blazing speed of Vite, you can build a modern development environment that helps you focus on what matters: creating great user experiences.
Once your setup is complete, you’re ready to explore Vue’s powerful features like reactive data, component-based architecture, routing, and state management. This foundational setup paves the way for a smooth and enjoyable journey in front-end development.